We're happy to be sharing another advanced tutorial for Cocos Creator. This tutorial allows you to interact with a map, zoom in, drag, and zoom out without losing focus on the map.
Though this tutorial isn't that difficult, (It's a simple map view behind a mask) there's a lot of ground covered that will help you to understand how to build a scene and custom components, both necessary for you in building your game.
Before we start, Download our final version to help you follow along and get the files you will need for the project. Also, if you want to follow with a video, check it out from our YouTube channel.
Design
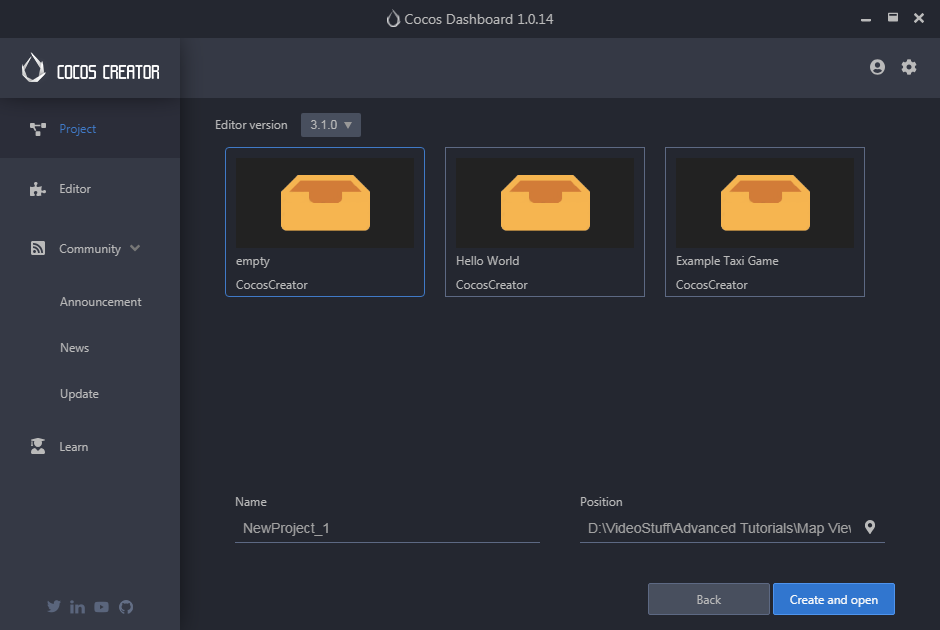
To start off, go ahead and open Cocos Dashboard and build a new project, choosing any version of Cocos Creator 3.0 or above.
When you open Cocos Creator, type "2" on the keyboard to move from a 3D perspective to a 2D perspective.
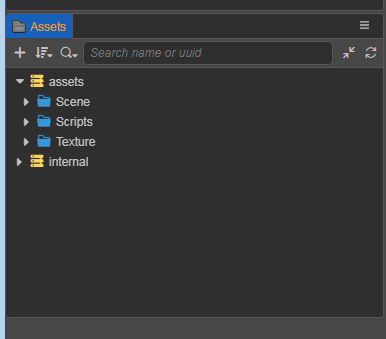
Start the project by building your three starting folders in your Assets panel:
- Scene: For all of your scenes (Main menu, credits screen, action screen, etc.)
- Textures: For your assets (audio, video, images, etc.)
- Scripts: For your TypeScript files
This isn't necessary, but it's best to stay clean for smaller projects (Better to use UUID system when in teams and high amount of assets)
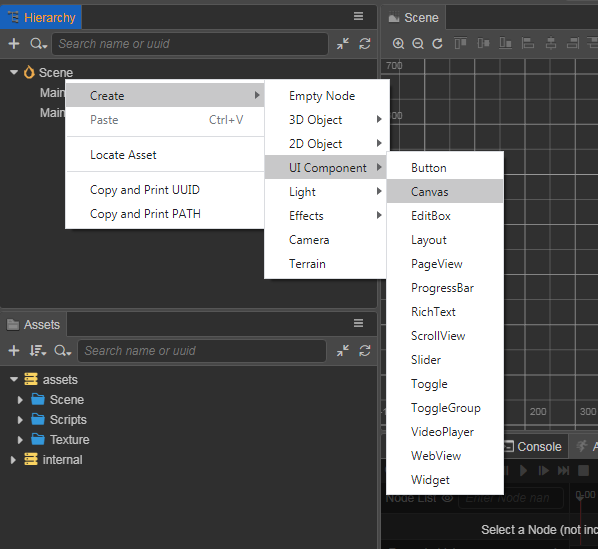
Next, we will need to add a Canvas to the scene. All 2D games will need a canvas to paint the game on. Add one by right-clicking the Scene in the hierarchy and adding a "Canvas" node.
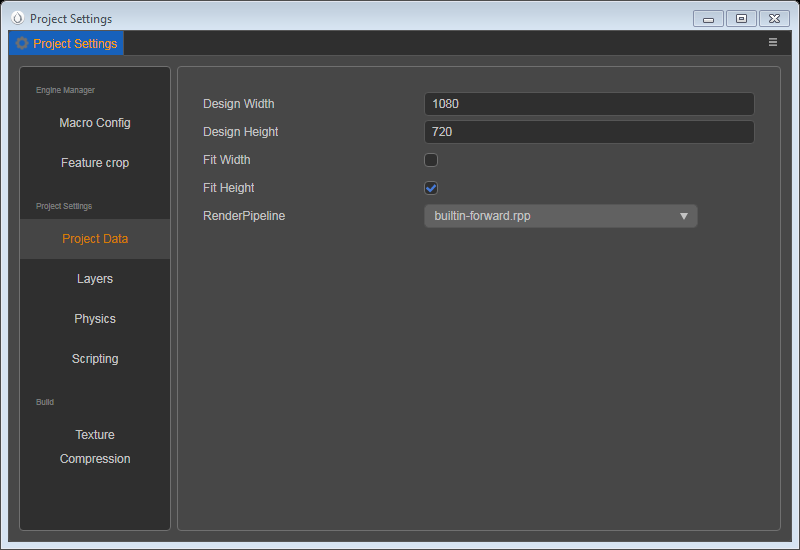
When you create a canvas it starts at a very small size. For us, we want to moderate the size of the canvas to a size of a phone. Most phones are at least 1080x720, so let's change it to that.
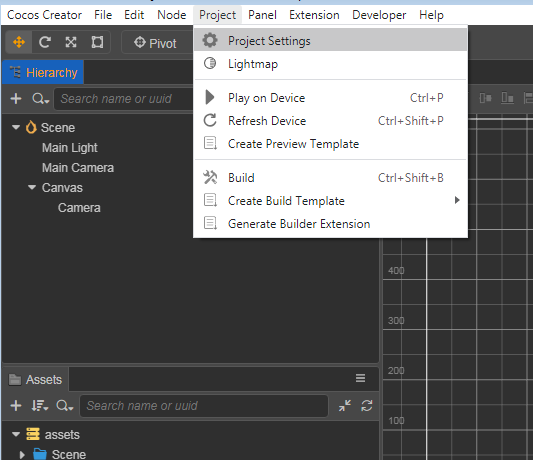
We can do this by clicking on the "Project" toolbar and going to the "Project Settings".
Inside, go to the Project Settings and Change the "Design Width" to 1080 and "Design Height" to 720. Keep "Fit Width" unchecked, but check "Fit Height" to allow different height phones to try it out.
Quick note: Make sure all of your images and layers are in the "UI_2D" layer. If not, your images may not appear in testing.
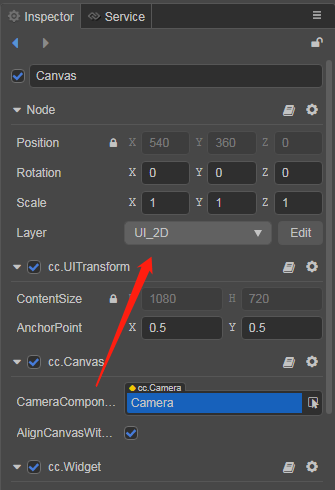
We want to have a basic background for this canvas. So, in the Canvas properties, you'll want to add a sprite as our background. Click on "Add Component" on the bottom of the properties and choose "Sprite" in the "2D section".
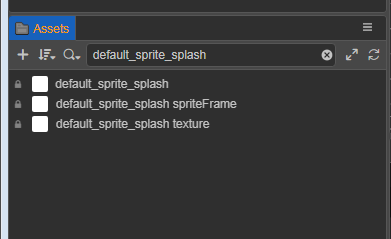
Within the cc.Sprite area, You'll want to add something to the SpriteFrame section that will be our background. To make it easy on us, we'll go into the internal section of our Assets and find "default_sprite_splash". It's easier to search for it rather than looking manually.
Drag it to the cc.Sprite area's SpriteFrame. You'll know it's correct because the box will turn green. (If you lost access to the Scene properties, just click once on it in the hierarchy area and it will appear in the inspector again.)
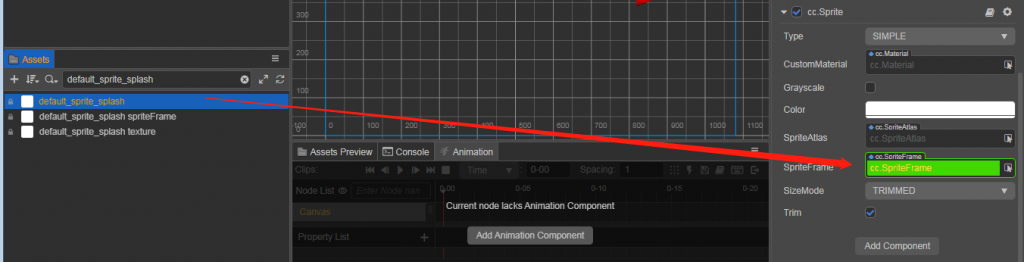
The scene will turn white as the sprite is set to expand to the entire size of the canvas. You can then change this color to anything you want by clicking on the "Color" section of cc.Sprite and choosing.

After choosing your color, (I randomly chose mine) and saved your work, (call your scene "SpriteFrame") you can now start building up the scene. Let's start by adding a mask so that the map is only seen inside the window of the mask and not the whole canvas.
To start, let's create an empty node inside the canvas. Right-click on the canvas in the Hierarchy panel and create "Empty Node".
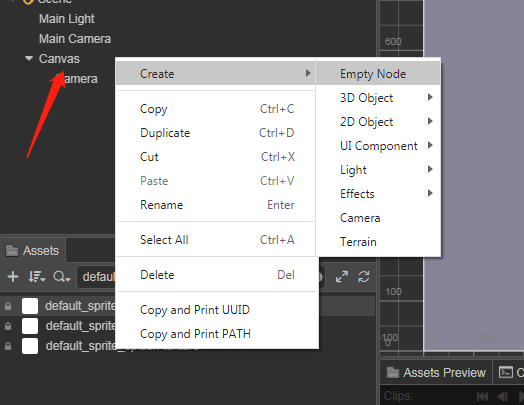
Before anything, let's change the node name to "Map Container" and the Layer to "UI_2D". If we don't change the layer, you'll make a mistake like we did in the video.
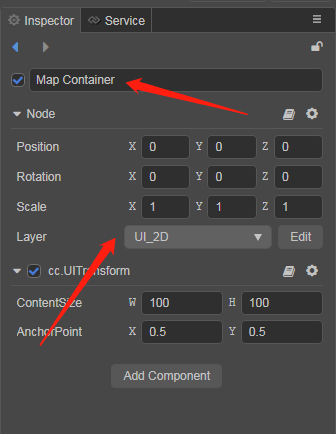
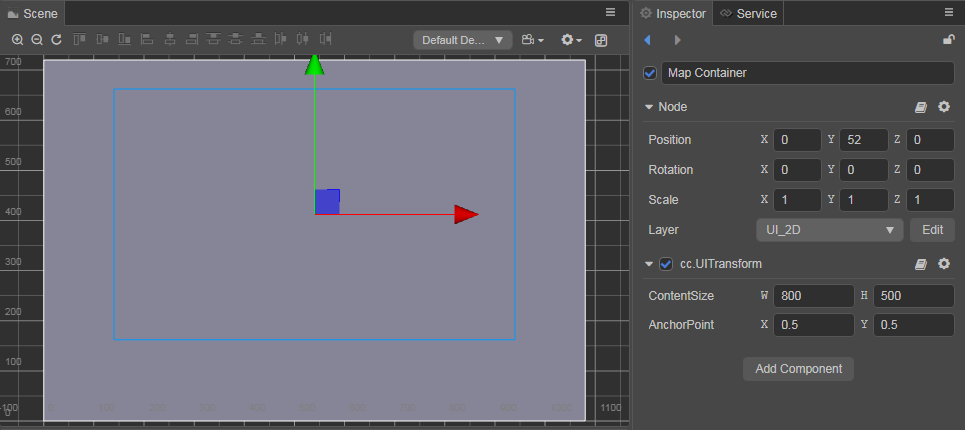
Now I want to move it a bit to make room for a text label I'll add later. So in the Position area, move it to (0,52,0). We also want the size of the window pretty big. So change the ConentSize to (800, 500) in ccUITransform.
We can now make it a window by adding the component cc.Mask by clicking the "Add Component" button and choose "Mask" in the "2D" section.
There are three really good options. Rect for rectangle, ellipse for a circle, and two stencils that allow you to add another image as your mask such as fog or other images that you think you need for your game. We'll be using "RECT" for our mask.
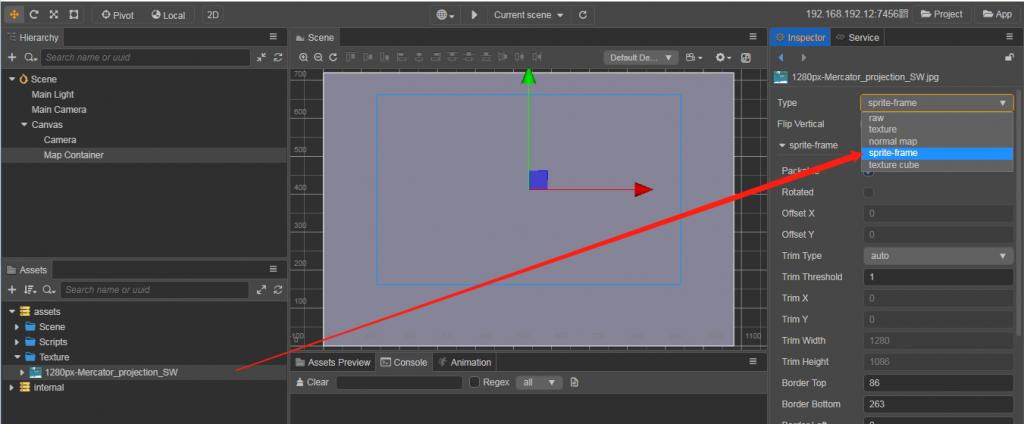
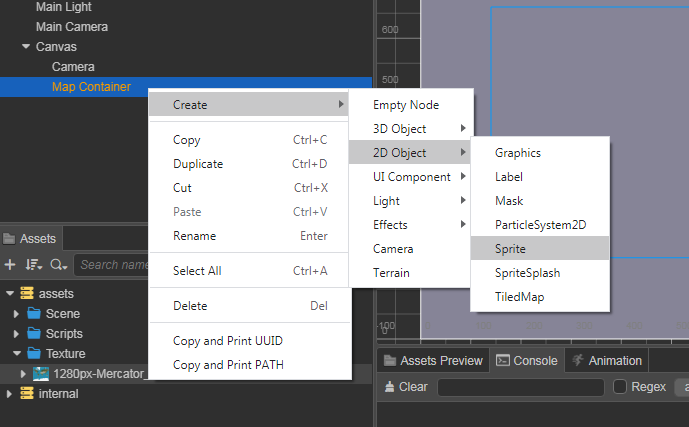
Now we can add the Map inside our mask. Any map will work for our tutorial, so have fun and choose your own. We grabbed one and added it to our "Texture" folder. After adding it, we click on the image and need to change it to a sprite-frame. Click on the green checkmark and you'll have a sprite frame version of the image.
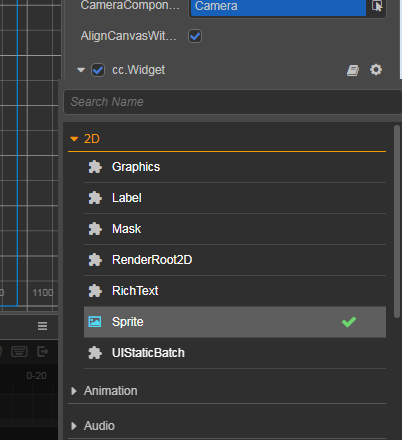
This is important as we want to add this as a sprite, so we need a sprite frame version of it. Go to the "Map Container" and add a Spite node from the 2D section.
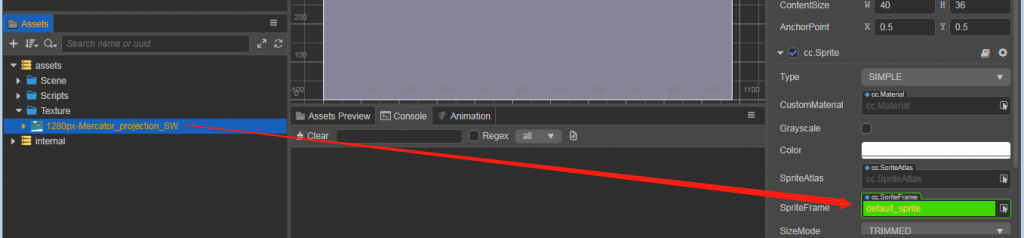
Click on the "Sprite" and go into the Inspector. We'll now drag the map we downloaded and drag it into the "SpriteAtlas".
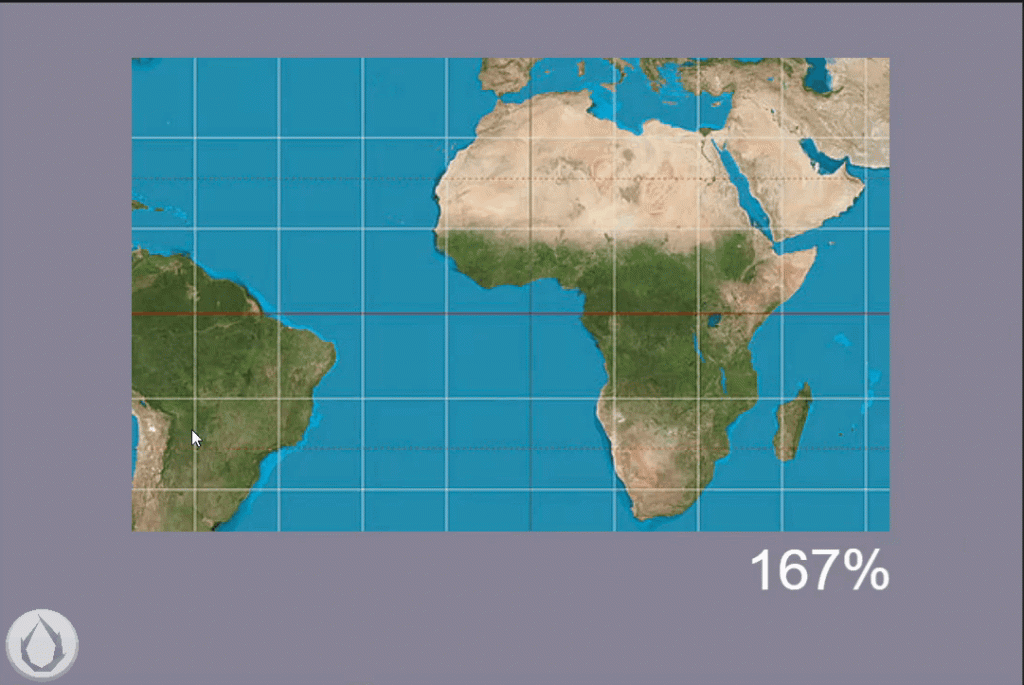
You can now see the map is in mask and looks like it's in a window! Very nice. We can now add one more thing and then we are ready to get to the code.
We can zoom in and out of the map in our tutorial. But to make sure how far we are zooming in and out, we need to have something tell us how far we zoomed in.
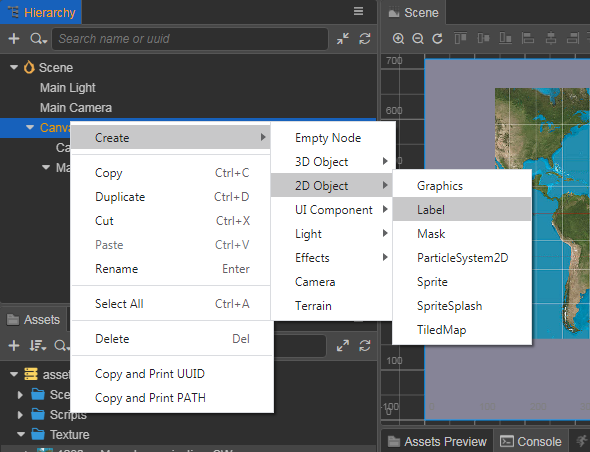
In the canvas node, add a "Label" node from the "2D Object" section.
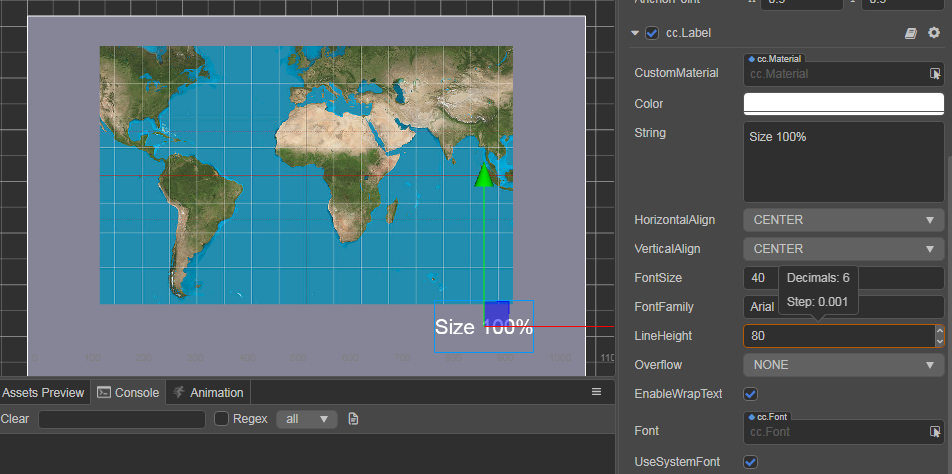
We need to do two things: Move to a readable place, and make it bigger. So first, we need to move the label to the right and under the map. We can increase the size of the label within cc.Label by changing the "FontSize" to 60 and the "LineHeight" to 80.
Let's also change the "String" to "Size 100%".
Now let's save and get ready for adding the coding part of our tutorial.
Coding
If you downloaded our final project (which you should), go to the Scripts section and make a copy in your project.
Select the Canvas node and have the properties on the right side. From the Scripts folder in Cocos Creator, drag MapControl to the properties, to add it to the node.
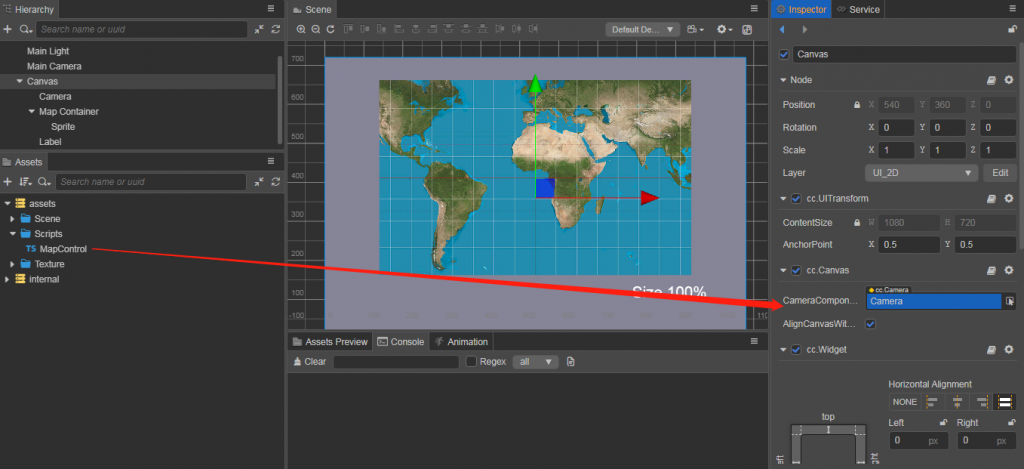
Within the custom component, drag the map sprite to the "Map" option and the Label to the "ScaleTime".

Let's talk a bit about each part of the "MapControl" code. From within the editor:
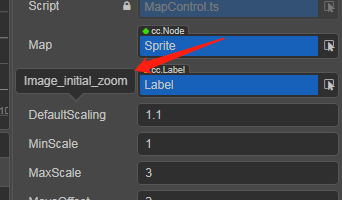
- Script is which script you are using (locked because it is the component code)
- Map is the node that is the map sprite
- ScaleTime is changing the text of the label
- DefaultScaling is what you want the original scale to be. (1 = 100%, 2 = 200%, 0.5 = 50%, etc.)
- MinScale = Minimum scaling
- MaxScale = Maximum scaling
- MoveOffset = sensitivity of a finger moving on the screen (don't want it moving just having your finger on the screen)
- IncreaseRate = How fast the mouse scroll can go
These can be edited the numbers as much as you want and their values will be the final value when you export the build compared to in the code.
Now let's open the code! We won't go through all of the code, but we will give you some idea of what all of the parts do.

This early part shows all the APIs we'll need for the parts to work. You can learn more about them from our API documentation.
Every component you add to a node will need to be added as a @ccclass.
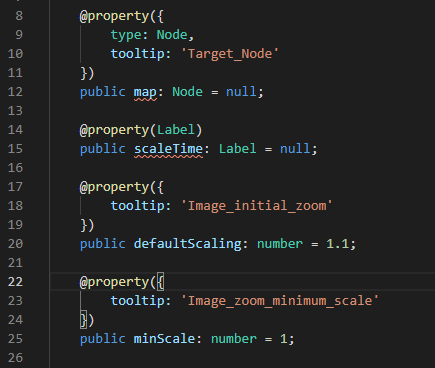
From Line 7 - 41, we have @property allows you to make edits to the property inside the editor of Cocos Creator. You can also give tips that you get hovering the property by adding it here as well.
The rest of the script are all the functions within the script. Here is a summary of all of the most important ones:
- addEvent – All of the event calls (mouse drag, finger drag, scroll wheel zoom, two finger zoom)
- smoothOperate – Does the zooming
- dealScalePos – Ensures that when the map is scaled, the entire map remains filled within the screen area at all times, without the map edges extending beyond the interior of the screen boundary. The position of the map nodes is therefore dynamically updated according to the screen boundaries.
- dealMove – The dealMove method moves the map in response to an event when a single finger is touched. When two fingers touch, it is a zoom operation.
- dealSelect – Delivers the mouse location on a mouse-up click
- calculateEdge – See if we are on the edge of the map to make sure we don't move past it.
Now, go ahead and run the game!
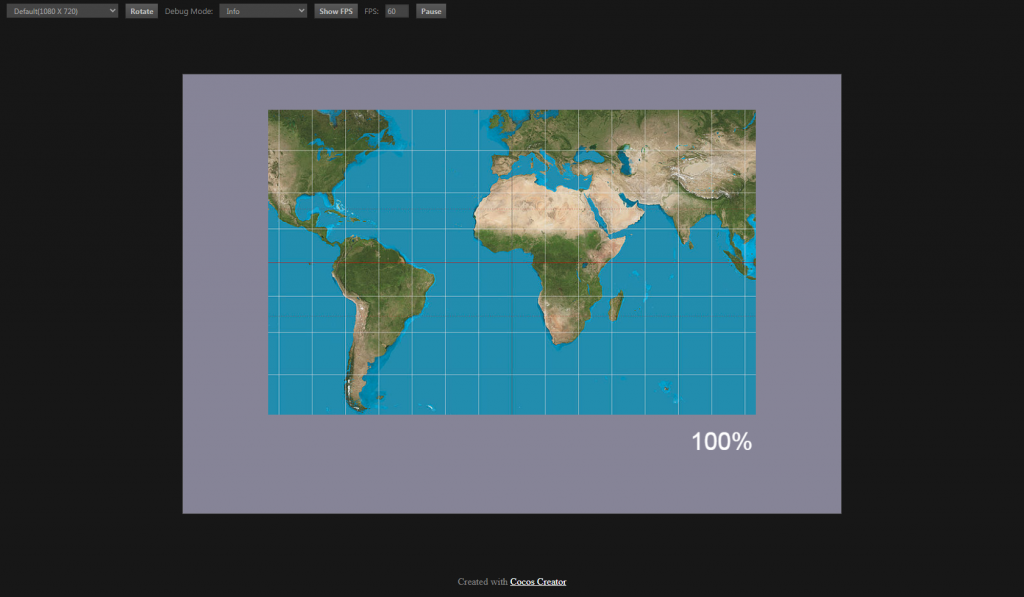
And there you go. Go have fun editing the "MapControl" component and thanks for following our tutorial. If you have issues, go ahead and try our final project.