Recently, a developer named kx-dz shared a technical article in our forums called "Introducing a Map Collision System Based on Signed Distance Field (SDF)." The Cocos Chinese community praised the article.
Cocos contacted the author and obtaining permission to reprint the article and also conducted an exclusive interview with the writer and producer of the game project "League of Battle Royale."
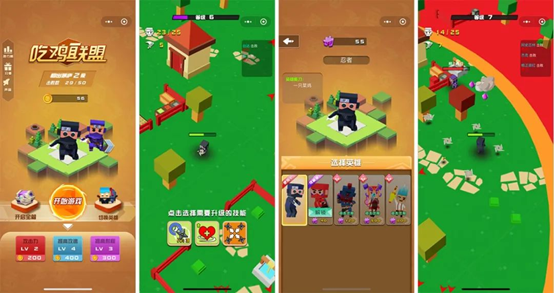
"League of Battle Royale" is a battle royale mini game developed by Nanjing Yiyou Network Technology Co., Ltd. based on Cocos Creator 3.0 Beta. The team, founded in 2017, is currently gaining experience in building games using HTML5.
At present, the team has a total of 4 people, serving as project producers (developer, business, operations, etc.), technical development, and art design.
"League of Battle Royale" was built in March 2020. During the epidemic, members constantly searched for new product directions through remote office work. The previous products of the team were all based on a level system, which was limited by the size of the team. Level-based games also required more content and higher production costs. The previous products were not very effective, so by taking into account the characteristics of small games, user interest, and the team's own capabilities, the battle royale category was finally selected as the main development direction for the team.
The first version was completed at the end of April. This is the team's second 3D product and the first battle royale product. It added AI to improve game playability and spent a considerable amount of time on AI research.
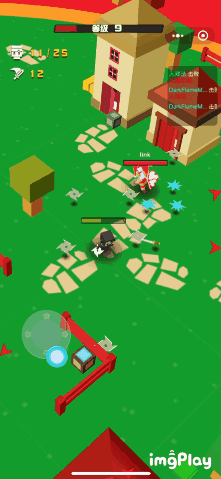
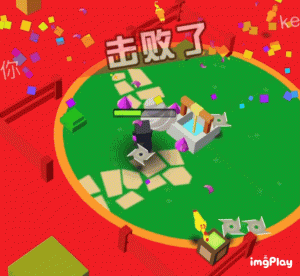
The game incorporates Battle Royale and .io element. The gameplay is straightforward. Move the characters while you launch attacks at enemies nearby automatically. You can also use bunkers to avoid enemy attacks. Picking up the purple diamonds in the game increases your level, which unlocks upgrade skills, such as recovering health, increasing attack power, increasing attack speed, increasing range, etc. As time progresses, the game map will shrink, and the player must move to the Safe area. Otherwise, you will be killed in the poison circle.
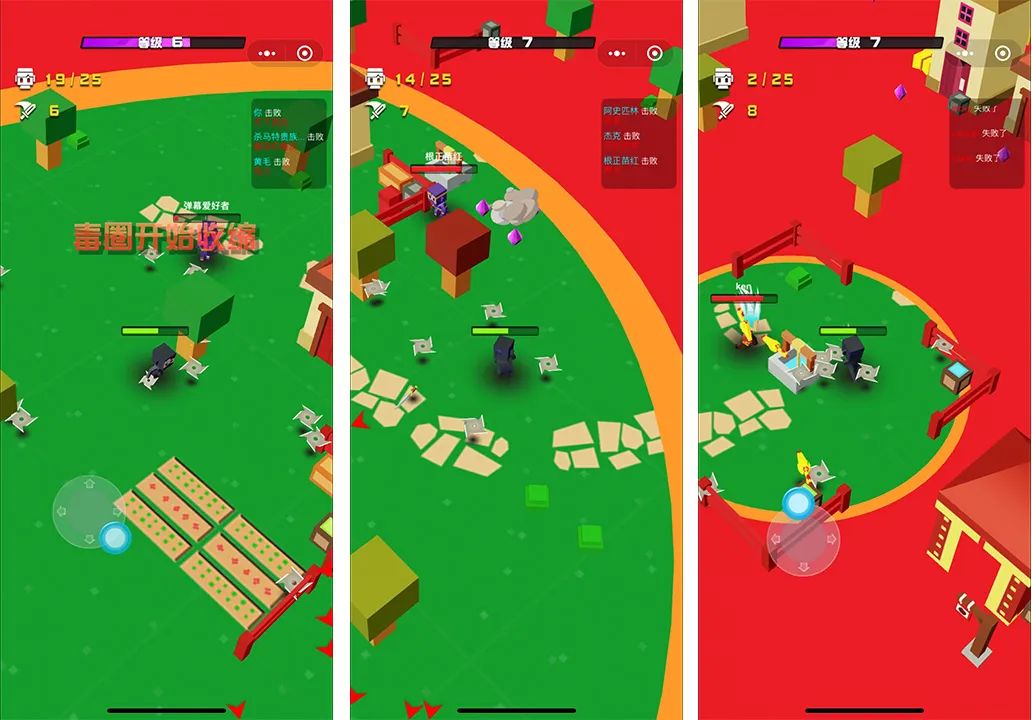
In addition to the circle shrinking mechanism, the difference between "League of Battle Royale" and other types of shooting games is reflected in the speed of the bullets.
Most of the shooting games are asymmetric attacks from different weapons. The bullet speed in "League of Battle Royale" is relatively easily avoidable but with multiple coming at players. Players can also avoid enemy bullets and use their position to attack other players. This mechanism allows players to experience the fun of playing with more skill and dodging.
Interview with the Developers
Cocos: The collision detection between players and obstacles in the game is using "SDF technology." How did you apply this technology to this game?
Qiu HongLei (CEO): Currently, the leading platform we're releasing games on is WeChat mini-games. The WeChat mini-game platform's performance requirements are still relatively demanding, especially for Apple mobile phones. At the beginning of the project, the team had two options: One is based on the physics engine; the second is the use of SDF technology. This game involves a lot of pathfinding algorithms and obstacles. So based on performance considerations, we chose to use SDF technology to achieve collision detection.
Traditionally, for the design of such a scenario, the first thing that everyone thinks about is the physics engine, which blocks the action of the characters by setting up colliders of buildings and obstacles.
Under this kind of thinking, if there are more buildings and people in the scene, it will cause more severe performance problems, because the collision detection needs to be calculated between every pair of obstacle and players in each frame. The calculation amount is: N (Person) * M (obstacle). Coupled with the calculation of collision detection between the bullets and the player, there may be a lot more performance pressure on the iOS platform that does not support JIT. Of course, the collision detection method based on the physics engine could also be optimized, for example:
- Using simple built-in physics instead of another physical backend.
- Collision calculation can eliminate objects that are not in the visible range through scene management
- Simplified 3D collision detection to 2D collision detection, simplified circular collision body rather than box collision body
However, the efficiency of these optimizations is far inferior to the signed distance field collision system used in the game.
Cocos: How did you create your scene collision detection system based on Cocos Creator?
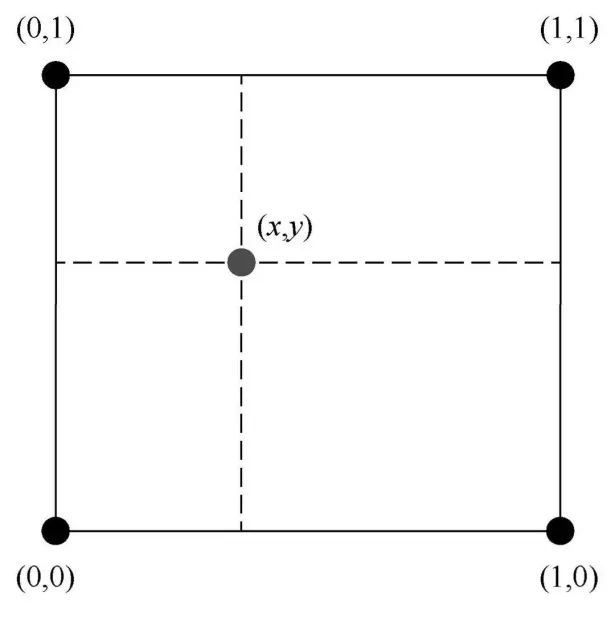
First, the principle of implementation is to obtain the directional distance data of any point through interpolation calculation and then compare it with the collision size of the unit to detect whether the unit can pass. The example diagram is as follows:

If you are doing a pseudo-3D game like "Arena of Valor," you only need to consider the plane position factor. You don't need to consider the height, you don't need too accurate collision judgment, and the map elements are fixed. The map collision system based on Signed Distance Field (SDF) can be used for reference.
1. Principle
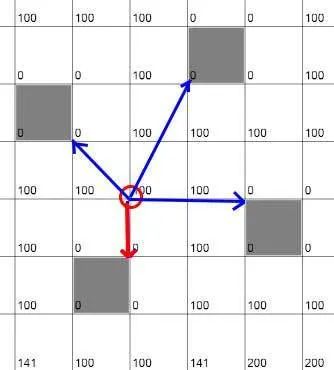
Divide the map into N*N grids. The four corners of each grid store distance data. These data points are the distance from the point where each corner is to the nearest obstacle. As shown below:

The dark grid is impassable, and the number of the cross points represents the distance from the point to the nearest impassable grid (from now on referred to as "signed distance").
Through directed distance data, we can calculate the distance from any point to the nearest obstacle by calculating the difference.
As shown in the figure, when judging whether the sprite is passable, as long as the data on the grid where the current position of the sprite is located is interpolated once, it can be judged whether it is passable, which is very efficient.
2. Specific implementation
Now, how do you get this data?
2.1: Rasterized map data
The map is divided into N*N grids, and each grid is marked as passable/impassable. Of course, the more divided the grid, the higher the accuracy is.
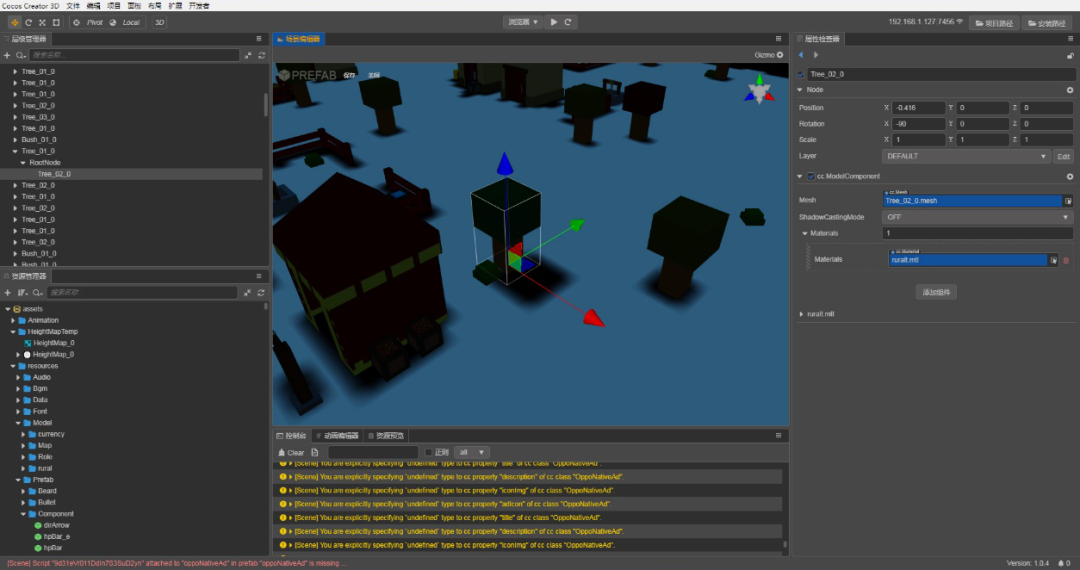
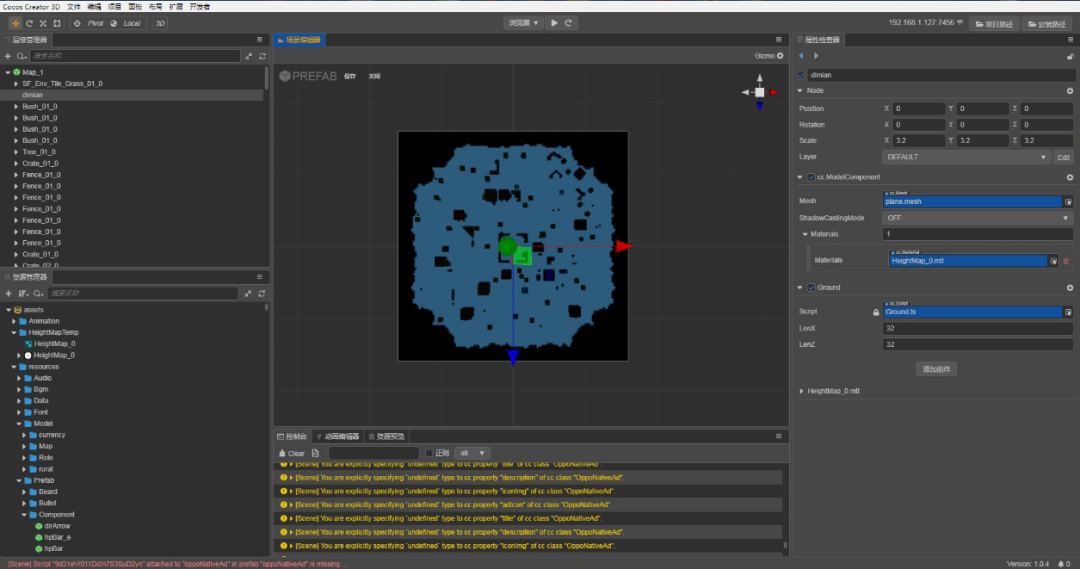
It is recommended to use a heightmap to store the obstacle and building data. The heightmap looks like this:
This is a 128*128 picture, representing 128*128 grids divided by the map. The color of each pixel on the above image indicates whether it is accessible, black is an obstacle, and white is an accessible area.
2.2: Read raster data
After preparing the picture, you need to read the pixel information. (implementation based on native platforms)
//Get the pixel data of the specified image file. Return to Promise
//The path is written to the file name, no need to add spriteFrame and //suffix
loadImagePixelData(path:string){
    var self = this
    return new Promise((resolve,reject)=>{
        loader.loadRes(path+"/spriteFrame",SpriteFrame,(err,res)=>{
            if(err){
                console.error(err)
                return reject();
            }
            var spriteFrame = <SpriteFrame>res;
            var rect = spriteFrame.rect;
            var img = new Image();
            img.src = spriteFrame.texture.image.nativeUrl;
            // console.log(spriteFrame._image.nativeUrl);
            // console.log(spriteFrame._image.url);
            img.onload=()=>{
                self.context.drawImage(img,0,0,rect.width,rect.height);
                var imageData = self.context.getImageData(0,0,rect.width,rect.height);
                resolve(imageData);
            }
            img.onerror=()=>{
                reject("Error:load img failed!Path="+path);
            }
        })
    });
}
If successful, you will get imageData in a format like this:
{
    data: [0,0,0,255,0,0,0,255,…],
    height:128,
    width:128
}
The data is stored in groups of four, storing the RGBA value of each pixel in an image, in the order from left to right and from top to bottom (following the canvas coordinate system). Convert the color data to a two-dimensional Boolean array, which is the pass data of each raster of the map.
Code:
//Transforming height map data into map traffic data
//imgData Format:{data:Uint8ClampedArray,width:number,height:number}
imgData2PassData(imgData:any){
    var data = imgData.data;
    var result = [];
    var width = imgData.width;
    var height = imgData.height;
    if(data.length<width*height*4){
        console.error("Error:The image data length is insufficient!")
        return [];
    }
    var count = 0;
    for(var y=0;y<height;y++){
        var arr = [];
        for(var x=0;x<width;x++){
            var r = data[count];
            var g = data[count+1];
            var b = data[count+2];
            arr.push(r>128&&g>128&&b>128);
            count+=4;
        }
        result.push(arr);
    }
    return result;
}
2.3: Calculate the directed distance data of the four corners of the grid
Each angle (that is, the intersection of grid division lines) needs to be calculated once. If you divide the map into N*N grids, there will be (N+1)*(N+1) intersections of directional distance data to be calculated.
For each intersection:
It is necessary to traverse all the grids first. If it is an impassable grid, determine the orientation relationship between the grid and the current point, and decide which angle of the grid is used to calculate the distance to the current position.
After deciding, calculate the distance between two points. All impassable grids must calculate the distance from the current position, and finally take their minimum value, which is the directional distance value. Just like this:
Code:
//Store the pass data, which was done in this step
private _blocks=[]
//Used to store directed distance data
private _distances=[];
initSdfSys(){
    var gridCountH = 128;
    var gridCountV = t128;
    this._distances=[];
    for(let i=0;i<gridCountV+1;i++){
        let dataArr = [];
        for(let j=0;j<gridCountH+1;j++){
            var value=0;
            dataArr.push(value);
        }
        this._distances.push(dataArr);
    }
    this.refreshData();
}
private refreshData(){
    for(let y=0;y<this._distances.length;y++){
        for(let x=0;x<this._distances[y].length;x++){
            this._distances[y][x] = this._checkDis(x,y);
        }
    }
}
//Distance detection
private _checkDis(vertX:number,vertY:number):number{
    var result;
    for(let y=0;y<this._blocks.length;y++){
        for(let x=0;x<this._blocks[y].length;x++){
            if(this._blocks[y][x]){
                let dis;
                if(y>=vertY&&x>=vertX){
                    dis = Math.floor(this.gridSize*(Math.sqrt(Math.pow(y-vertY,2)+Math.pow(x-vertX,2))));
                }
                else if(y<vertY&&x>=vertX){
                    dis = Math.floor(this.gridSize*(Math.sqrt(Math.pow(y-vertY+1,2)+Math.pow(x-vertX,2))));
                }
                else if(y>=vertY&&x<vertX){
                    dis = Math.floor(this.gridSize*(Math.sqrt(Math.pow(y-vertY,2)+Math.pow(x-vertX+1,2))));
                }
                else if(y<vertY&&x<vertX){
                    dis = Math.floor(this.gridSize*(Math.sqrt(Math.pow(y-vertY+1,2)+Math.pow(x-vertX+1,2))));
                }
                if(isNaN(result)||dis<result) result=dis;
            }
        }
    }
    return result||0;
}
Optimization:
Because the amount of calculation is as high as (N+1)(N+1)N*N times, it may consume a lot of time. After experiments, a map with a grid size of 128*128 has the calculation speed that is still acceptable in the pure H5 environment and Android WeChat mini-game environment. Nevertheless, in the iOS WeChat mini-game environment, the calculation time is as high as 50 milliseconds. Obviously, it is unacceptable.
Therefore, we used the method of preprocessing the data in advance and then exporting the JSON file. You can directly read the preprocessed data during runtime. This was our idea of exchanging memory space for speed, and it is also the core idea of the SDF system.
2.4: Use SDF collision system
In three steps:
Step 1: Determine which grid the character’s current position belongs to, this is easy.
Step 2: Obtain the directional distance of the four corners of the grid and calculate the interpolation;
Interpolation calculation code:
calPointDis(pos:Vec3){
    var gridLen = 32;
    var gridPos = this.nodePos2GridPos(pos);
    if(this._block[gridPos.y]&& this._block[gridPos.y][gridPos.x]) return 0;
    var posZero = this.vertexPos2NodePos(gridPos.x,gridPos.y);
    var parmX = (pos.x-posZero.x)/gridLen;
    var parmY = (pos.z-posZero.z)/gridLen;
    var dis_lt = this._distances[gridPos.y+1][gridPos.x];
    var dis_ld = this._distances[gridPos.y][gridPos.x];
    var dis_rt = this._distances[gridPos.y+1][gridPos.x+1];
    var dis_rd = this._distances[gridPos.y][gridPos.x+1];
    var dis = (1-parmX)*(1-parmY)*dis_ld+parmX*(1-parmY)*dis_rd+(1-parmX)*parmY*dis_lt+parmX*parmY*dis_rt;
    return dis;
}
Step 3: The finally obtained value indicates the volume radius of the character which allows him to pass. If his radius is too large, the character will be blocked from passing.
2.5: Processing after collision detection
In the game, when the player uses the joystick to control the character, if they hit the wall, they must not be allowed to stop immediately. The operation experience is terrible. The usual way is to let the character slide along the wall.
The SDF-based collision system has a set of ways to deal with such situations, that is, by calculating the collision normal to obtain the correct position of the player after encountering an obstacle when moving.
Code to calculate the direction of the collision normal:
calGradient(pos:Vec3):Vec3{
    var delta=0.1;
    var dis0 = this.calPointDis(new Vec3(pos.x+delta,0,pos.z));
    var dis1 = this.calPointDis(new Vec3(pos.x-delta,0,pos.z));
    var dis2 = this.calPointDis(new Vec3(pos.x,0,pos.z+delta));
    var dis3 = this.calPointDis(new Vec3(pos.x,0,pos.z-delta));
    var result = new Vec3(dis0-dis1,0,dis2-dis3).multiplyScalar(0.5);
    return result.normalize();
}
Specific code to deal with collision:
update (deltaTime: number) {
    if(this._isControlledByJoystick&&this._speedRatio>0){
        var curPos = this.node.position.clone();
        var moveDis_dt = this.curSpeed*deltaTime;
        var newPos = curPos.clone().add(this.dir.clone().multiplyScalar(moveDis_dt));
        var sd = this.ground.calPointDis(newPos);
        if(sd<this.collideRaduis){
            //console.log("sd=",sd);
            var gradient = this.ground.calGradient(newPos);
            var adjustDir = this.dir.clone().subtract(gradient.clone().multiplyScalar(Vec3.dot(gradient,this.dir)))
            //console.log(StringUtils.format("dir=%s,gradient=%s,adjustDir=%s",this.dir,gradient,adjustDir));
            newPos = curPos.clone().add(adjustDir.normalize().multiplyScalar(moveDis_dt));
            for(var i=0;i<3;i++){
                sd = this.ground.calPointDis(newPos);
                if(sd>=this.collideRaduis) break;
                newPos.add(this.ground.calGradient(newPos.clone()).multiplyScalar(this.collideRaduis-sd));
            }
            // sd = this.ground.calPointDis(newPos);
            // if(sd<this.collideRaduis){
            //     newPos.add(this.ground.calGradient(newPos.clone()).multiplyScalar(this.collideRaduis-sd));
            // }
            if(Vec3.dot(newPos.clone().subtract(curPos),this.dir.clone())<0){
                newPos = curPos;
            }
        }
        this.node.setPosition(newPos);
        this.onMove();
    }
}
The details of SDF are not explained here in detail. At present, the information in this area of game development is relatively scarce. But, you can also browse more details on this and other things in the Cocos official forum. There are many valuable pieces of learning materials on the forum that can be tapped.
Finally, I would like to thank the Cocos team for their support over the past year. Due to the ease of use of the Cocos Creator engine, when we made small games in 2019, we took Cocos Creator as the preferred engine, and later when 3D engine was launched, we completed the team transformation from 2D to 3D with little learning cost. When we first used the 3D engine, we had no experience with optimization, and Cocos provided us with many good ideas. Especially in the later period of development, when the product starts some cross-channel and cross-platform operations.
Conclusion
Thank you very much for accepting the exclusive interview with Cocos, and thank you very much for the generous technical sharing of the team of "League of Battle Royale." hoping that the game can achieve excellent results!
If you want to play the game, go to WeChat and search for "吃鸡联盟".