An excellent development workflow can significantly improve development efficiency and speed up the operation process. This article will share some interesting development tips based on Cocos Creator 3.3.1, hoping to help developers optimize their development workflow and use Cocos Creator to make their games and apps faster and better.
Editor Tips
I believe everyone has a thorough understanding of the Cocos Creator editor, but do you know that the editor also has "hidden tips"?
View switch
When the Scene Editor is in 3D view, there are minor changes from the original 2D view, but shortcuts are provided under the 3D view to help developers quickly move and position the Scene Editor's view:
- Left mouse button + Alt: Rotate around the center of the view.

- Right mouse button + QEWASD: Camera roaming.
- Shift + right mouse button + QEWASD: Faster roaming.
Clone node
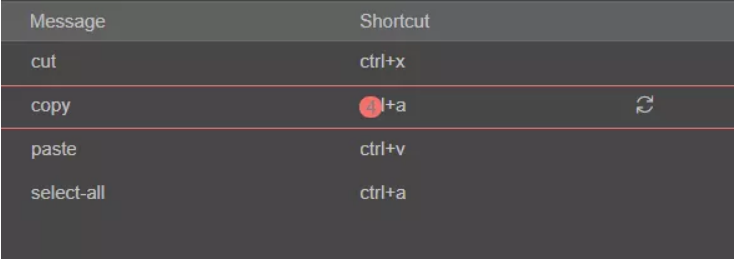
Are you still using Ctrl + C, Ctrl + V to clone nodes? Creator provides a more concise shortcut key Ctrl + D to clone nodes more quickly and conveniently.
If you need to clone a node into a child node of another node, hold Ctrl + drag the node.
Shortcut manager
If you have things you do a lot or want to know a shortcut key for something, we have a panel for managing editor shortcut keys. Developers can open this panel through Cocos Creator -> Shortcut in the main menu.

We can bind any key or key combination to the Cocos Creator editor. For example, change the shortcut key to open the build panel from Shift+Ctrl+B to just the B key.
If there is a key conflict on this panel, the Shortcut Key Manager will display a red dot with the conflict number.
Align/evenly distribute nodes
When the scene editor is in 2D view, a row of buttons in the upper left corner can be used to align or evenly distribute multiple nodes when selected. The specific rules are as follows:
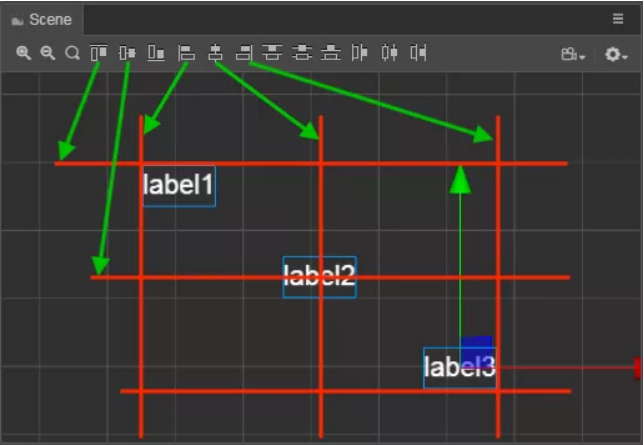
- Align at the top, align according to the bounding box of the node closest to the top
- Vertically centered, aligned according to the overall horizontal centerline
- Align at the bottom, align with the bounding box closest to the bottom
- Align left, align according to the border closest to the left
- Align horizontally in the center, align according to the overall vertical centerline
- Align right, align to the border closest to the right
The 6 distribution buttons from left to right in the second half will sequentially connect these nodes:
- Top distribution, evenly distributed according to the upper boundary of the node
- Vertically centered, evenly distributed according to the horizontal center line of the node
- Bottom distribution, evenly distributed according to the lower boundary of the node
- Left distribution, evenly distributed according to the left boundary of the node
- Horizontally centered, evenly distributed according to the vertical center line of the node
- Right distribution, evenly distributed according to the right boundary of the node
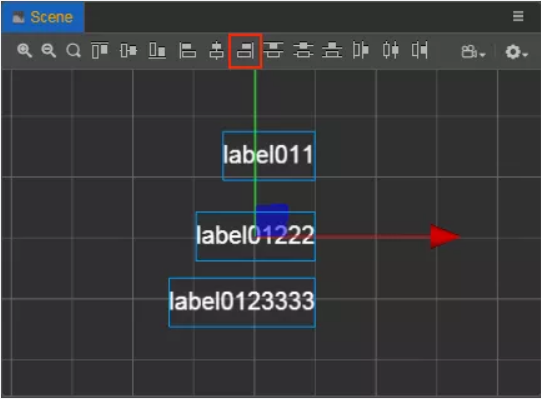
Note: x and y coordinates will not always be aligned perfectly due to the way a bounding box for a node might act when left, right, or center aligned.
For example, in the figure below, when we align three Label nodes of different widths to the right, we get the alignment of the right boundaries of the three node bounding boxes, rather than the x-coordinates of the three node positions becoming the same
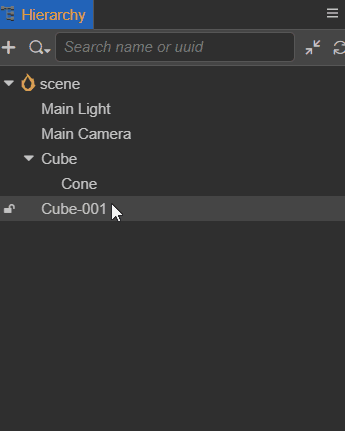
Locked nodes
In the Hierarchy Manager, move the mouse over the node, and you will see a lock button on the left. After clicking the lock, the node cannot be selected in the scene editor. This function can effectively avoid wrongful selection and wrongful editing of nodes in complex scenes.
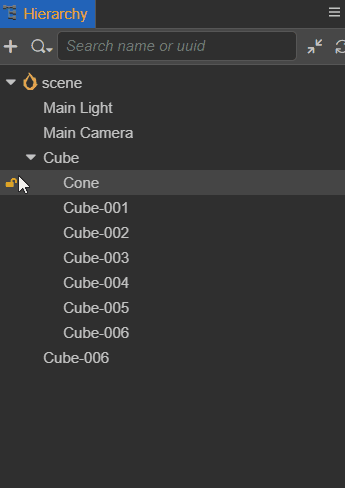
If you need to lock the child nodes of this node, you can press the Alt key and click the lock to lock all the child nodes together.
Attribute hints
During the development process, developers may encounter some unfamiliar attributes and not know their meaning and usage. In this regard, Cocos Creator provides the intelligent feature of attribute prompts. Move the mouse over the attribute in the Creator panel, and a brief introduction to the attribute will appear.

Note: At present, the attribute prompt is still being improved. If you encounter an attribute that is not prompted, you can first check our official documentation and then send feedback in our forums to our staff if there are issues.
If you are building custom scripts, you can add your own attribute hints in the code by adding a 'tooltip' to their @property item.
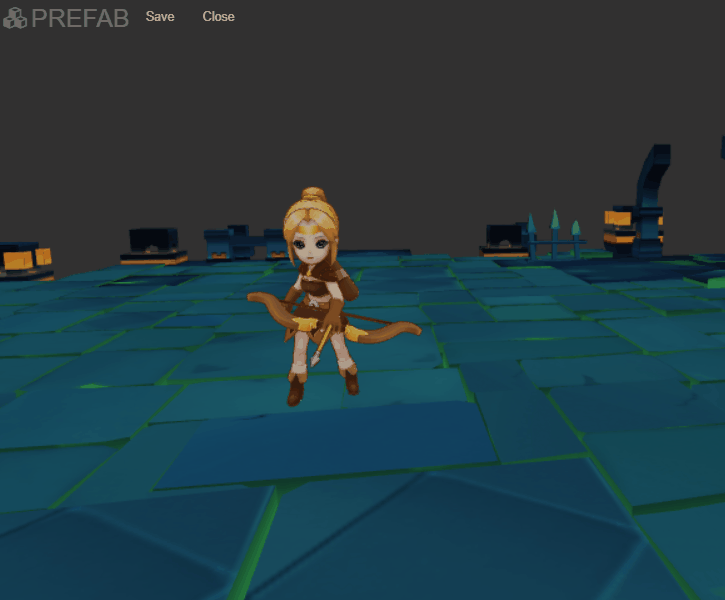
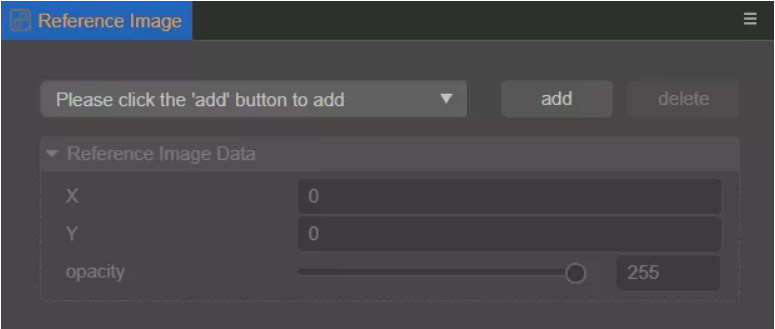
Reference image settings
When performing UI stitching based on the renderings provided by the art team, many developers will directly pull the final art image into the project scene for comparison. Still, this method is cumbersome, and you might forget to delete the resources after the stitching is completed. They are causing an error or other issues.
Considering this situation, Cocos Creator has launched a reference image panel, which is a non-intrusive way and is mainly used to assist developers as a reference when stitching UI in the scene editor.
By clicking the button in the upper right corner of the scene editor, you can open the reference image panel. Click the Add button on the panel to add a UI reference image, and you can switch the currently displaying reference image from the drop-down box.
Code writing
While writing code, developing good coding habits, and using powerful writing software and plug-ins can significantly reduce the probability of rework and improve development efficiency.
Writing norms
When developers are developing projects, they often work in teams to develop together. At this time, good coding habits are crucial:
- Code naming must be standardized, and structure must be clear. For more detailed requirements on code naming conventions, grammar conventions, and writing conventions, you can refer to the article: [Recommended coding conventions]
- Avoid using uncommon syntax, usage, components, etc., to make code upgrades more convenient.
- Avoid using node lookups in an update. Consider using variables to save commonly used nodes and components during initialization.
- Each function is kept as simple as possible and has a single function.
- Complicated algorithms can be calculated in advance, and space is exchanged for time.
Writing tools
Using good code to write software is a very "beautiful" thing. It can help us do many things. In the Cocos Creator development workflow, it is recommended to use Visual Studio Code to write code.
Using Visual Studio Code
Code highlighting and smart prompts
Visual Studio Code provides handy code highlighting and smart prompt functions. When Cocos Creator 3.x creates a project, a tsconfig.json file is automatically generated in the project directory, configured with a directory file path for code prompts. When you open the project with VS Code and write code, it will automatically prompt the Cocos Creator engine API. If the project is upgraded, the engine API will also be updated automatically.
After starting VS Code, select File -> Open Folder... from the main menu, and select the project root directory in the pop-up dialog box, which is the path where assets and project.json are located. Then when you create a new script or open the original script for editing, there will be a syntax prompt.
If there is a problem with writing, a red line will appear under the error report.
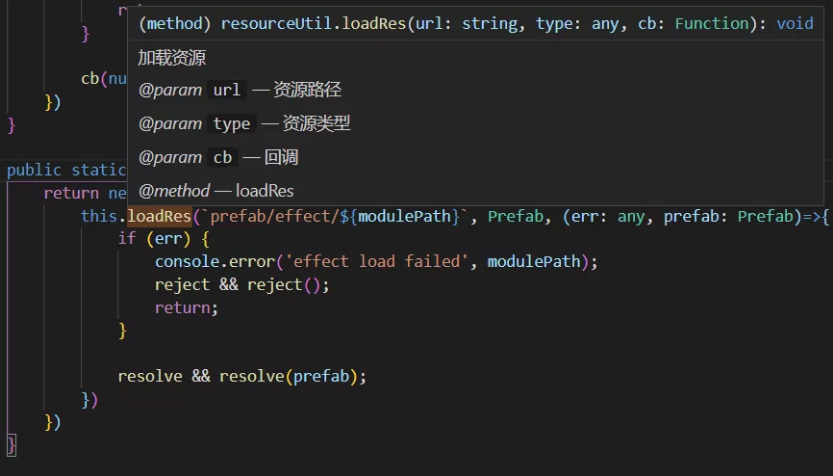
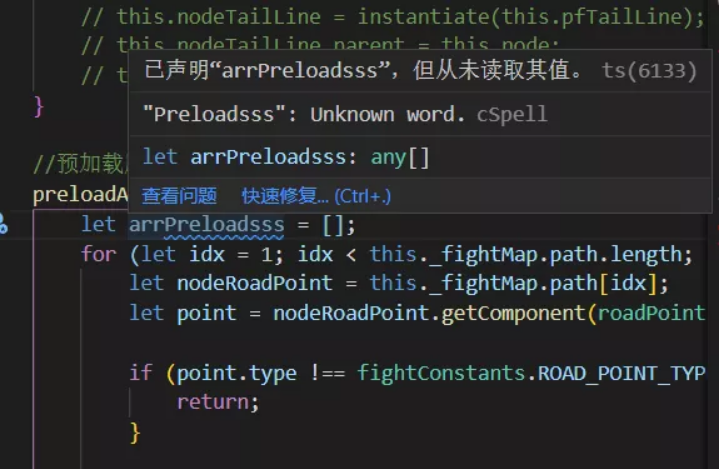
Clever use of jsdoc comments
Good code commenting habits can make the code easier to read. In addition to ordinary comments, here is an introduction to jsdoc comments:
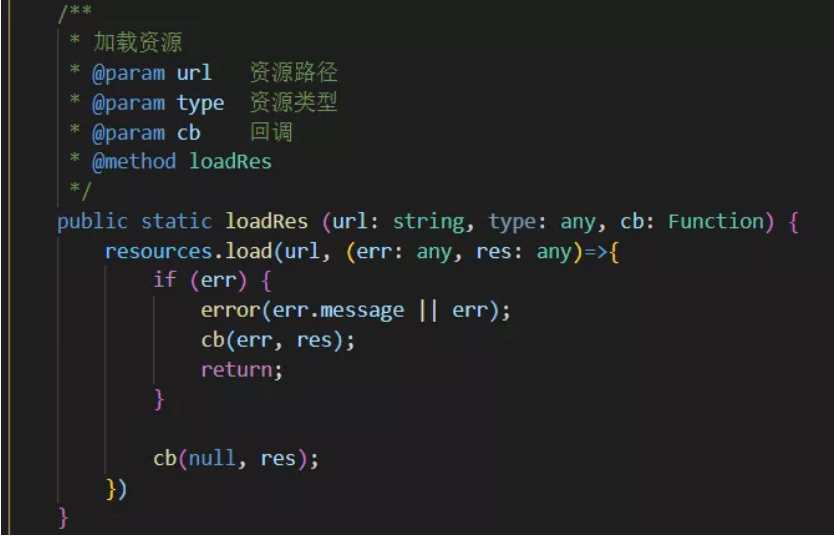
As shown in the figure above, writing a complete jsdoc comment can allow other developers to understand the function and method quickly, and it will be more apparent when the function is called. We only need to hover the mouse over the call to display it:
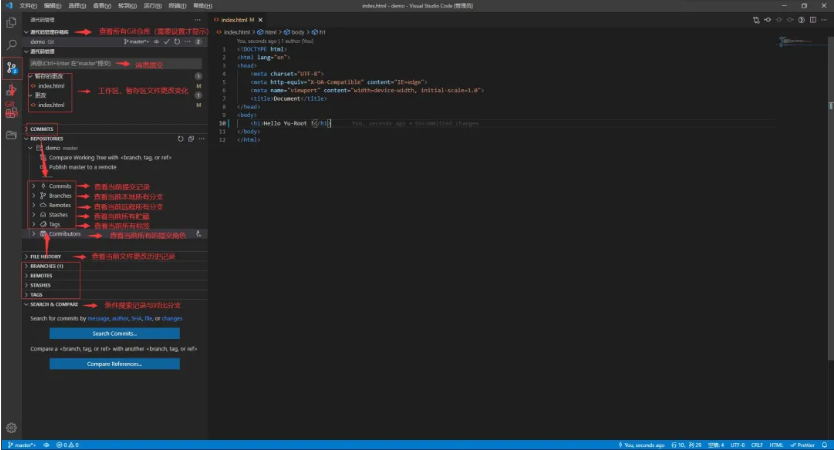
Use Git on Visual Studio Code
Developers often use Git for project management. You can also use Git for project management on Visual Studio Code. You can check [Use GitHub] for detailed methods.
Click to jump API
During the development process, we often encounter the need to query API information, view source code, and understand usage, the general operation is to go to the API query interface on the official website, but a Cocos Creator project already has built-in API information query and usage instructions in the cc.d.ts script. All we need to do is hover over the Cocos Creator API, press the Ctrl key, and then click on the API to jump to the cc.d.ts script to see the instructions.
Developers can also search and query API usage in the cc.d.ts script instead of going to the official website every time, saving much time.
Debug code
Visual Studio Code has excellent debugging capabilities. We can directly debug the web version of the game program in the source code project. You can directly set breakpoints and monitor the source file during the debugging process, which is more convenient and friendly than using Chrome's built-in DevTools to debug. The specific debugging method can be viewed in [Code Debugging].
Set file display and search filter
In the main menu of VS Code, select File (Windows)/Code (Mac) -> Preferences -> Settings, or select the Setting option in the lower-left corner. This operation will open the user configuration file USER:
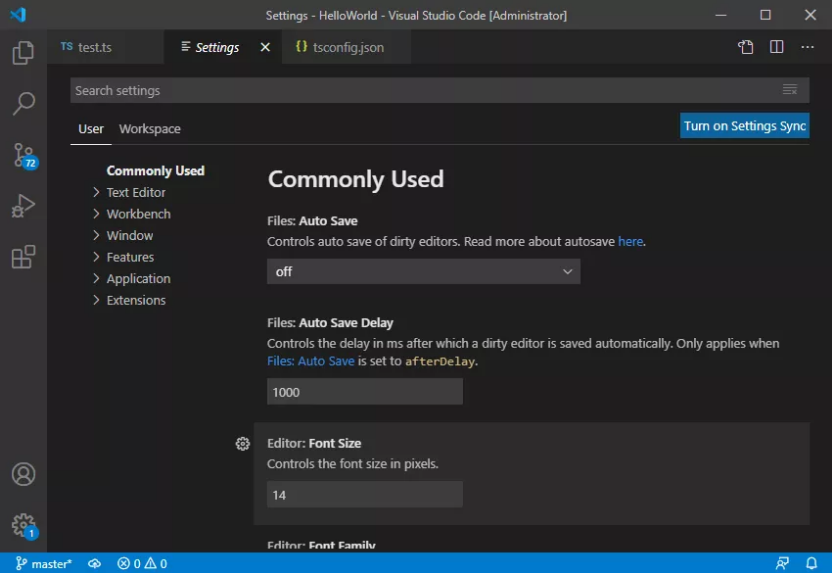
At this time, enter exclude search in the search box above and find the Files: Exclude and Search: Exclude modules:
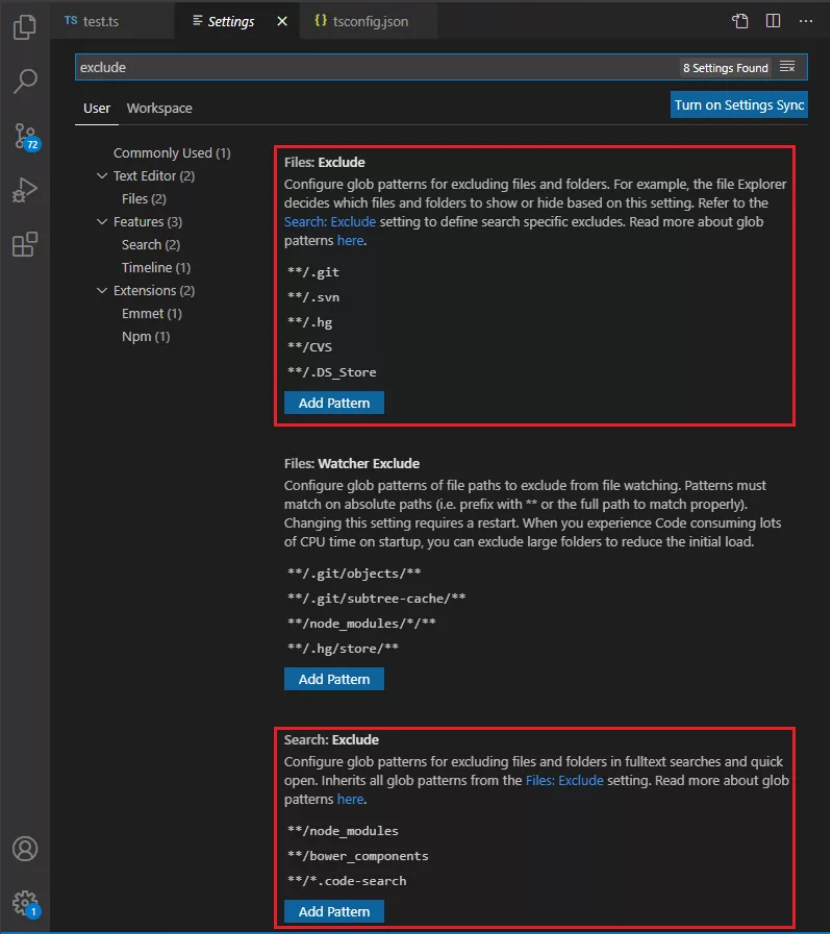
Then click Add Mode to supplement the missing parts in the following content:
{
     "files.exclude" : {
         "**/.git" :  true ,
         "**/.DS_Store" :  true ,
         "**/*.meta" :  true ,
         "library/" :  true ,
         "local/" :  true ,
         "temp/" :  true
      },

     "search.exclude" : {
         "**/node_modules" :  true ,
         "**/bower_components" :  true ,
         "build/" :  true ,
         "temp/" : true ,
         "library/" : true ,
         "**/*.anim" :  true
      }
 }
The above fields will set VS Code to exclude directories when searching and file types hidden in the file list. Since build, temp, and library are all paths automatically generated when the editor is running and contain the script content we wrote, they should be excluded from the search. Each file in the assets directory will generate a .meta file. Generally speaking, we don't need to care about its content. Just let the editor manage these files for us.
Useful shortcuts
Simple, rude, and easy-to-use shortcut keys can significantly help us improve the efficiency of writing code. The shortcut keys commonly used in Visual Studio Code daily development can be found in the document [VSCode keyboard shortcuts in Chinese and English].
Useful plug-ins
Visual Studio Code has a rich and powerful plug-in system. Here are some useful plug-ins.
- Code Spell Checker
This plug-in can help us find misspelled words in the code. In addition, it can automatically detect camel-case and underlined words. That is, don't worry about misreporting because of camel-case and underlined words.
- Bracket Pair Colorizer 2
When you see multiple levels of nested parentheses, do you feel very messy? This plug-in allows the commonly used brackets (), [], {} to be displayed in different colors. And when you click on the brackets, the left side will connect the line segment to its paired brackets, and the hierarchical structure is clear at a glance. In addition, it also supports functions such as user-defined symbols.
- GitLens
GitLens can enhance the built-in Git function of Visual Studio Code and provide a more friendly Git graphical operation interface. For more information about the usage and introduction of GitLens, please refer to [GitLens].
- koroFileHeader

A plug-in for generating file header comments and function comments. Support users to highly customize annotation options to adapt to various needs and annotations. It can automatically update the last editing time and editor when saving the file. For more information about the usage and introduction of koroFileHeader, you can check [koroFileHeader].
Useful Cocos Creator plug-ins
There are many useful plug-ins in the Cocos Store waiting for developers to discover. Today, I will share three of them with you, which can almost be a "must need" for development.
Cocos Inspector
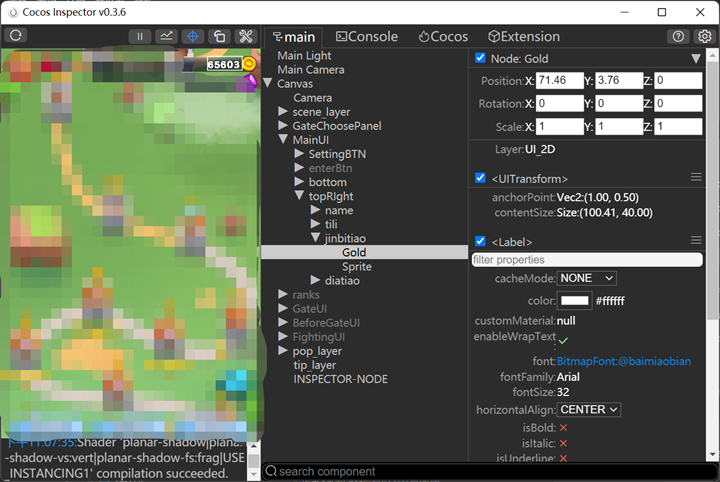
A highly acclaimed node tree real-time preview plug-in supports node reference positioning, node attribute control, node real-time DrawCall display, log display, view generated dynamic atlases, etc. For more introduction to Cocos Inspector, you can view [Cocos Inspector Chinese video tutorial].
Plug-in address:
https://store.cocos.com/app/en/detail/2940
Quick Finder
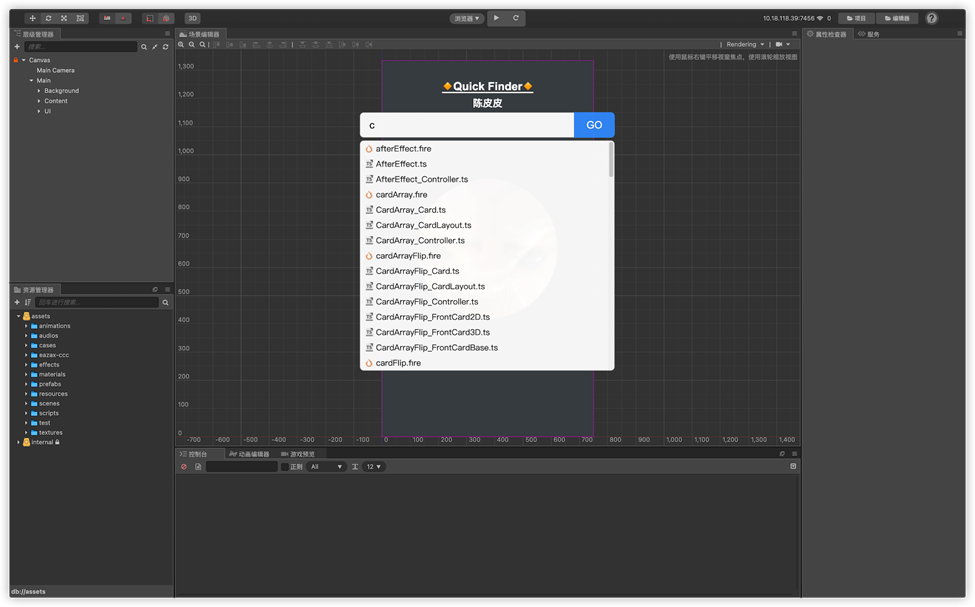
The editor's built-in search is too cumbersome? Want to find the files or resources you need quickly? Try this plugin for a quick search. Enter keywords to locate files in the project quickly and quickly open scenes and prefabs. There are also advantages such as support for fuzzy search, shortcut keys, open-source, etc., allowing developers to locate files when facing large projects quickly.
Plug-in address:
https://store.cocos.com/app/en/detail/2745
Quick editor
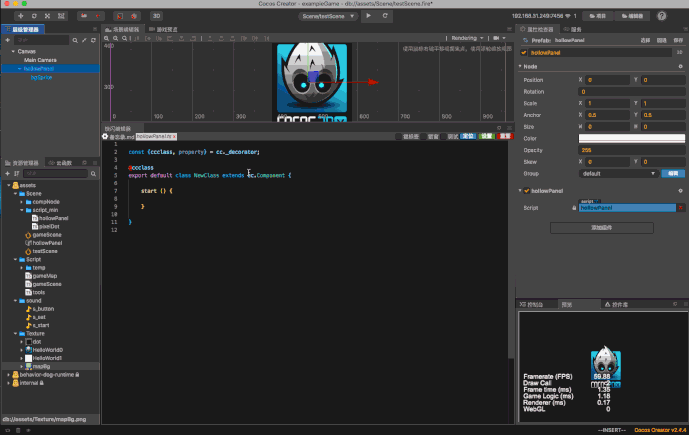
In daily work, game scripts are usually bound to nodes. If you want to modify the script code, you need to open a third-party code editor for editing. Click on the scene, and after using this plug-in, nodes can edit the script code directly in the node binding Creator in, quick and easy to modify the code block. In addition, the plug-in has features such as automatic correction of import paths, drag-and-drop components or resource generation variables, etc., which is a great help tool for convenient development.
Plug-in address:
https://store.cocos.com/app/en/detail/2313
For the video version in Chinese of this tutorial, please click here. Welcome everyone to explore the Cocos Creator using skills and continuously improve your development efficiency!