Since Cocos Creator v2.2 was officially released on October 18th, we’ve shown developers how we significantly optimized the performance of the native platform and how we also made a lot of changes at the engine level, including 3D model rendering, greatly enhanced TiledMap support, and so on. Detailed version changes can be viewed [click here].
In addition, the Cocos Creator 2.2 version improved the material system, making it easy to create and write material and effect files in the editor. Compared to the previous version, v2.2 also has a lot of differences in the rendering component level.
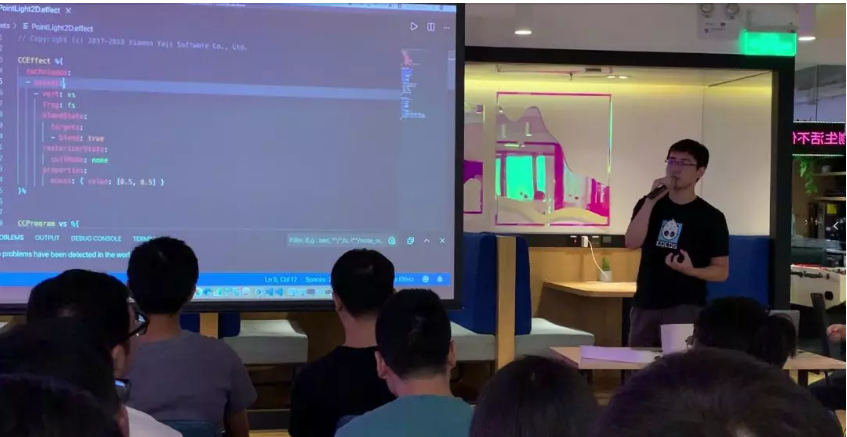
Liu Hang, a cocos engine development engineer, gave developers a detailed look last week on how to customize the rendering components and materials based on Creator 2.2.
First, Render Components, Assembler, And Materials
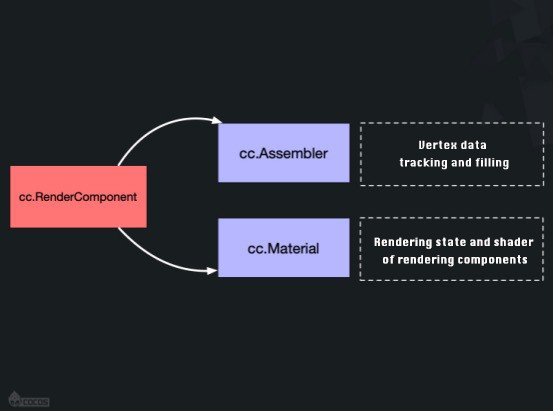
In the engine, all rendering components are inherited from cc.RenderComponent (cc.Sprite, cc.Label, and so on.) The Assembler of the component is mainly responsible for the update processing and filling of the component data. Since different rendering components are also different than the data content and padding, each rendering component will have its own assembler object, and all assembler objects are inherited from cc.Assembler. Material as a resource, mainly records the rendering state of the rendering component, the texture used, and the shader.
Second, Custom Rendering Components And Assembler
Custom rendering component
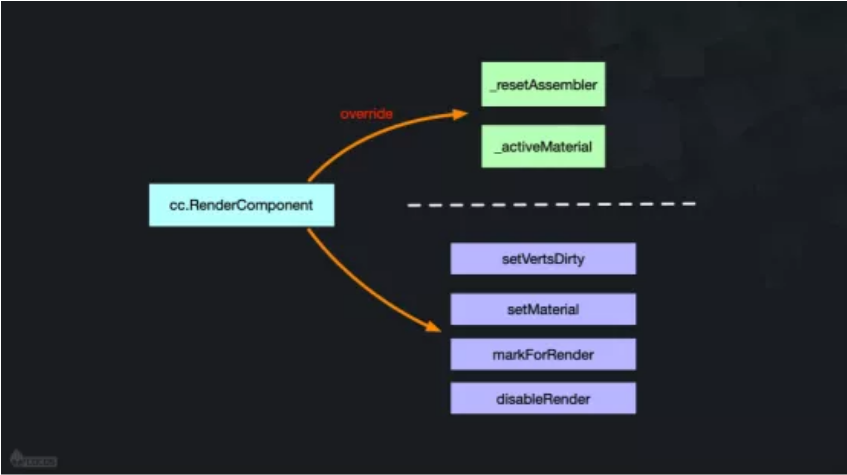
Custom rendering components need to inherit the cc.RenderComponent object. The cc.RenderComponent has two empty methods that must override the _resetAssembler and _activeMaterial methods.
The _resetAssembler is called when the component is created and is executed before the component lifecycle method. It is primarily responsible for creating and initializing the Assembler instance of the rendered component.
The _activeMaterial method is responsible for creating and setting the material instance used by the render component, which is called when the component is enabled and the material is modified.
In addition, the render component has a number of methods that control the rendering state:
- markForRender and disableRender control whether the rendering component is rendered
- setVertsDirty sets the flag when the rendering component data is updated
- setMaterial is to set the material instance to the render component

Custom Assembler
After defining the custom rendering component, you also need to define the corresponding assembler. The custom assembler inherits the cc.Assembler object, and the cc.Assembler has three empty methods that must be rewritten: init, updateRenderData, and fillBuffers.
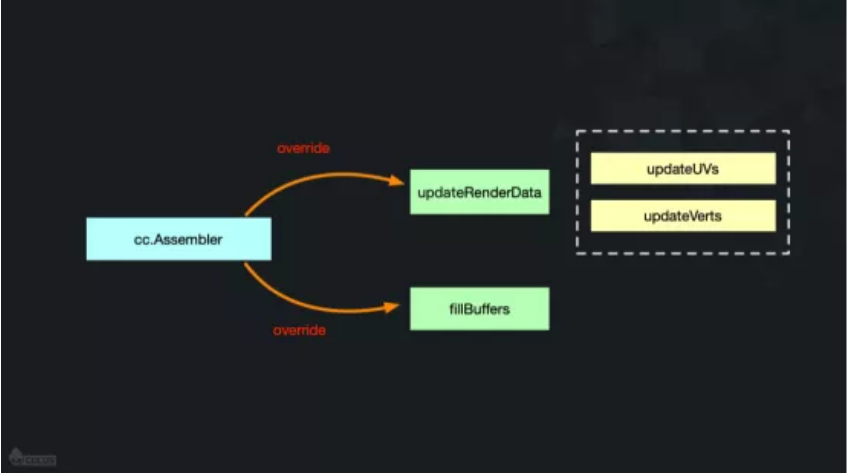
- Init is responsible for initializing the rendering data and some local parameters
- updateRenderData is responsible for updating and modifying when the vertex data of the rendering component changes.
- fillBuffers is responsible for Buffer filling of vertex data during rendering
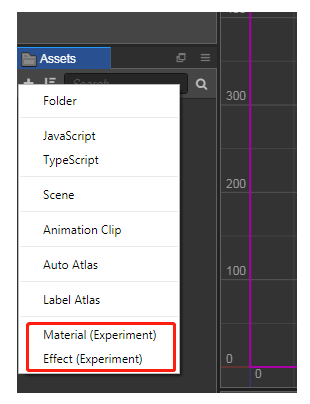
Custom Material And Effects
The Cocos Creator 2.2 version of the material and effects are stored as resources and can be easily and quickly created by the editor without the need to create code.
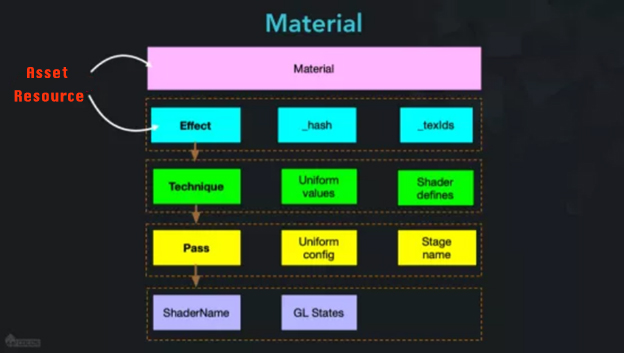
The hierarchical structure of the material objects is shown in the following figure: Each material object points to a unique effect object. Each effect object can have multiple techniques. Each technique can create multiple passes, and the blend mode is recorded in pass. Render mode such as stencil test, the name of the Shader used, and the uniform value used in the shader.
Select the material resource in the editor, compare the material file of the material through the property inspector, you can see the specific attribute corresponding:
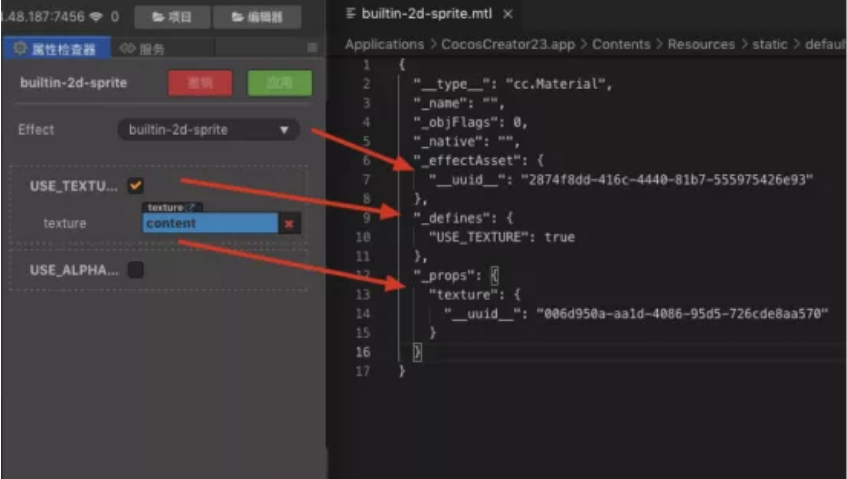
In the material, specify the effect resource to be used by uuid, and select the effect resource in the editor. Take 2d-sprite as an example, you can see the specific content of the file. There are three main parts in effect: CCEffect, CCProgram vs and CCProgram fs.
CCEffect is the content of the material object structure introduced in the previous section. It records all the relevant rendering states and the uniform of the rendering component. The syntax and format of this part are based on YAML, which is more concise and convenient than JSON writing. For a detailed introduction, please refer to YAML Official documentation.
CCProgram vs and CCProgram fs are vertex shaders and fragment shaders, respectively, and the syntax is standard GLSL syntax.
The effect file can be written using VS Code. Double-clicking the effect file in the editor will automatically open it in VS Code. Also, the VS Code plug-in Cocos Effect supports syntax highlighting of the effect file.
Demo example
The custom rendering components associated with this article and the custom Assembler demo.
download link: https://github.com/cocos-creator/demo-shader
To help you in learning and give you a reference on how to customize the material and write the Shader, here are some sample scenes of the Shader that are created and ported in the Demo:
Example of screen post-processing based on RenderTexture:

Simply follow the point source effect:

Scroll background:

Screen raindrop effect:

If there are any problems and issues, or if there are valuable things you want to share, please share with our community in the forums.